Welcome, Guest
Username: Password: Remember me
Threaded Indented

TOPIC: Long exposure shots: A tutorial

Long exposure shots: A tutorial 1 day 1 hour ago #3799

  • Darth Cephalus
  • Darth Cephalus's Avatar
  • OFFLINE
  • Junior Member
  • Many tentacles, the dark side has.
  • Posts: 20
  • Like received: 13
So I notice that a lot of people are posting pictures of themselves and their sabers on the forum. Many of them are great but they are mostly still frames. I think we as a community can step up our game.
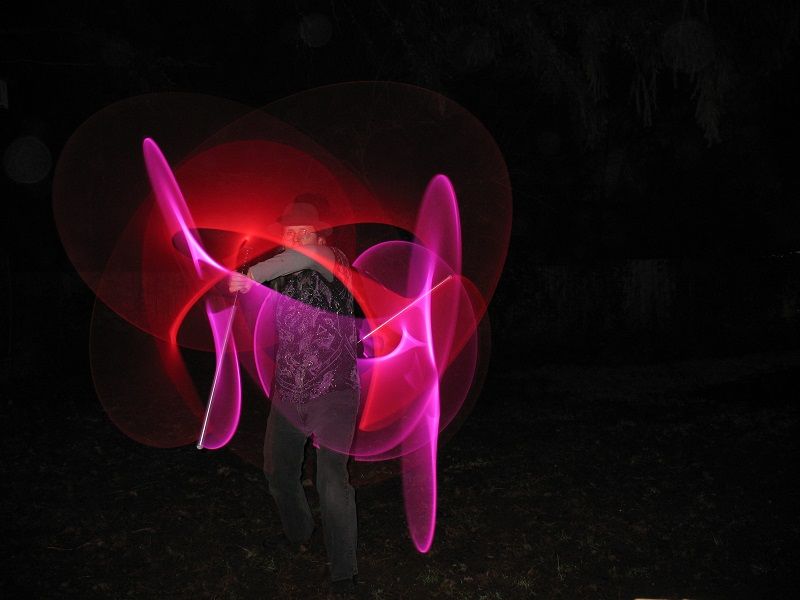
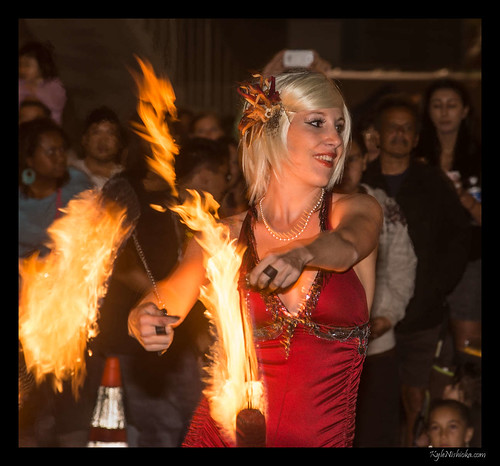
We have all seen those nice trailing photos of light and fire. LED sabers in action are a great way to get some very interesting shots like this.


The purpose of this tutorial is to introduce people to action shots of sabers, and to a lesser extent, light painting in general. As a note, I am not a professional photographer. I just play around a bit. If anyone has any finer points or corrections to make, please feel free.

First things first, you will need a few things.

1. a camera
While the cameras on phones are getting better and better these days, there is really no substitute for a real digital camera. You need not have an expensive one exactly. Mine is an old Kodak Powershot. The main thing is that you need a camera that will let you manually adjust the aperture, exposure, flash, and iso settings.

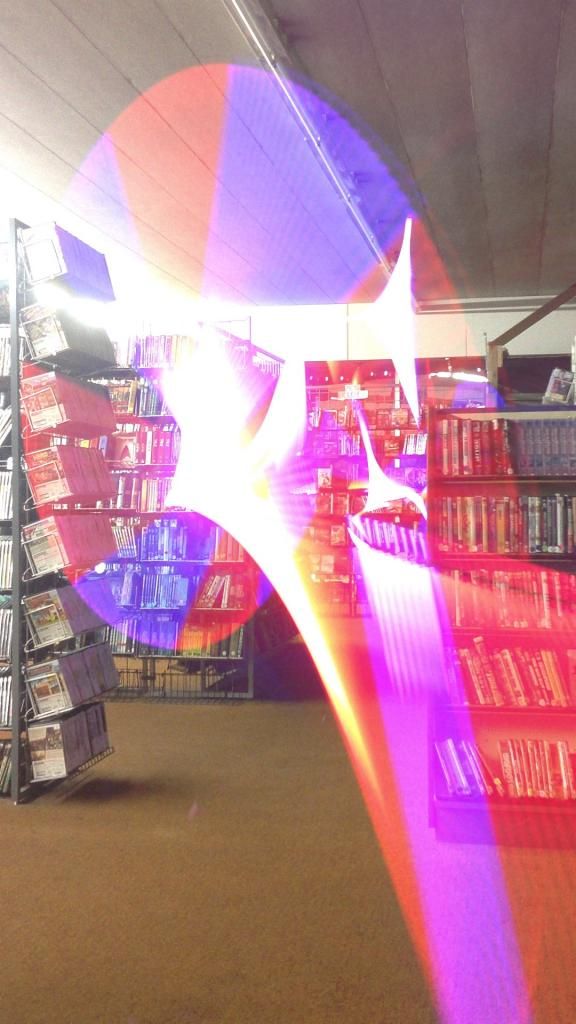
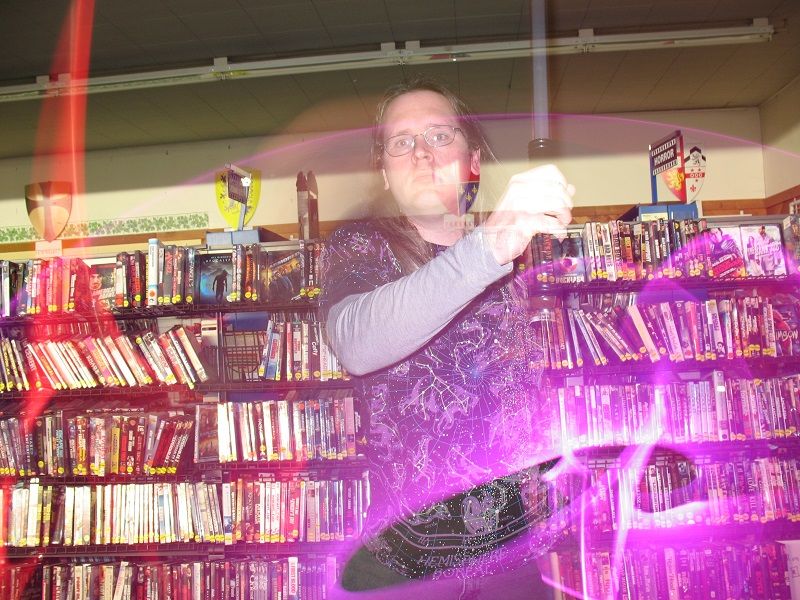
Note: there are apps that will let you do a few of these on your phone but it is iffy at best. One that I found called photon capture lets you controll exposure, but without controlling flash, it just marks high points leading to an image like this

Notice that the it only picks up the brightest points, so it gets the saber as I run through the store but not me.

2. a tripod
This is not exactly necessary but is recommended. Without one, you can still set the camera on a surface, but you will be limited by the surfaces at your disposal. Hand held is not a real option with long exposure. You will still catch the light but stationary items will go wibblie. Note the street lamps in the back of this hand held picture.

A good tripod will give you flexibility.

3. a light source
Lightsabers will be the focus here but fire will also work, as will a simple flashlight.


4. dark
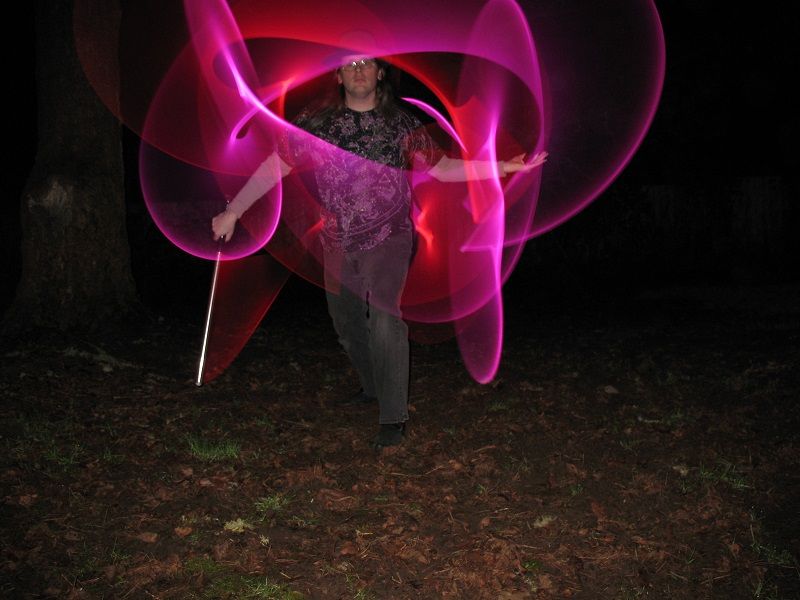
These work best if you have little to no ambient light. If you are in a lit room or outside when the sun is out, the best you can hope for is a ghost image of the saberist like the one seen here.

Now that you have the materials lets discuss the camera settings.

1. ISO
ISO is a setting that adjusts sensitivity to light. Higher ISO makes darker pictures more visible but leads to a grainy image. It is not that any of them will not be grainy, but a low iso setting makes the grain more fine. This is the setting I have the most trouble with on phone cameras. For saber action shots, I recommend an ISO setting around 100. I have found that this is a good balance between visibility and image quality.

2. aperture
Aperture has to do with depth of field. Most cameras have a variable aperture that can be set. If you have a zoom lens, you have variable aperture. For long exposure, you don't want the camera zooming or changing focus. I recommend an aperture setting between f8 and f16. This is a pretty small aperture. Wide aperture makes a lens fast, leading to crisp action shots. We want a trail and will get the crispness with a flash, so we want a slow lens.

3. curtain flash
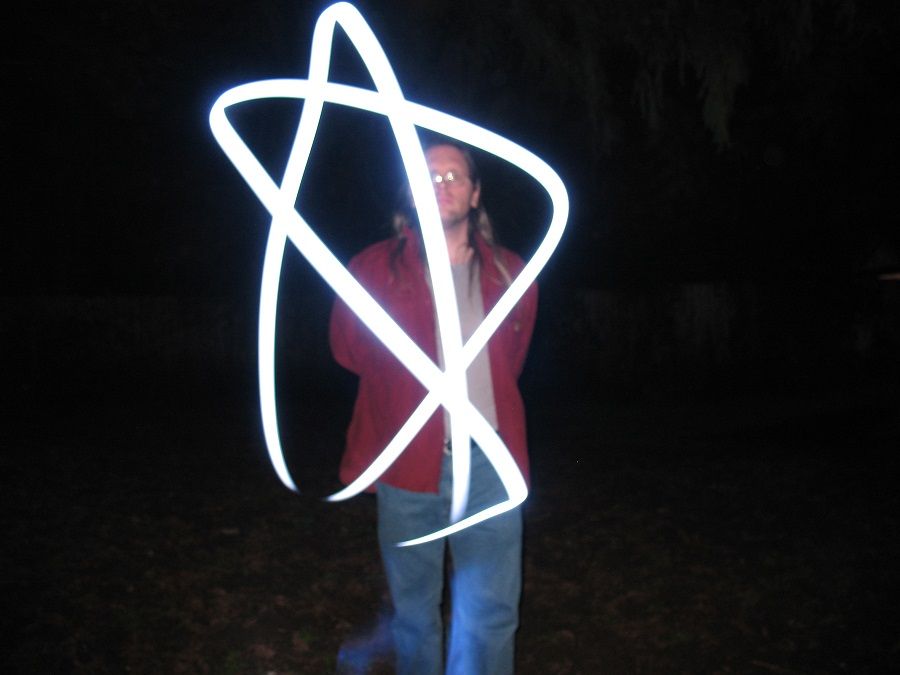
With a long exposure, the flash will not be going off throughout the shot. You will have to decide where in the exposure you want it to happen. When the flash happens, the camera will capture the non-illuminated components, like the saberist. Second or last curtain flash (inexpensive cameras may only have 2 curtains) will end the shot with the flash. This will make it look like the light is trailing from the saber. First curtain flash will start by capturing the saberist and make it look like the light precedes the saber (think the vectors in Donnie Darko). I am partial to second/last curtain flash.
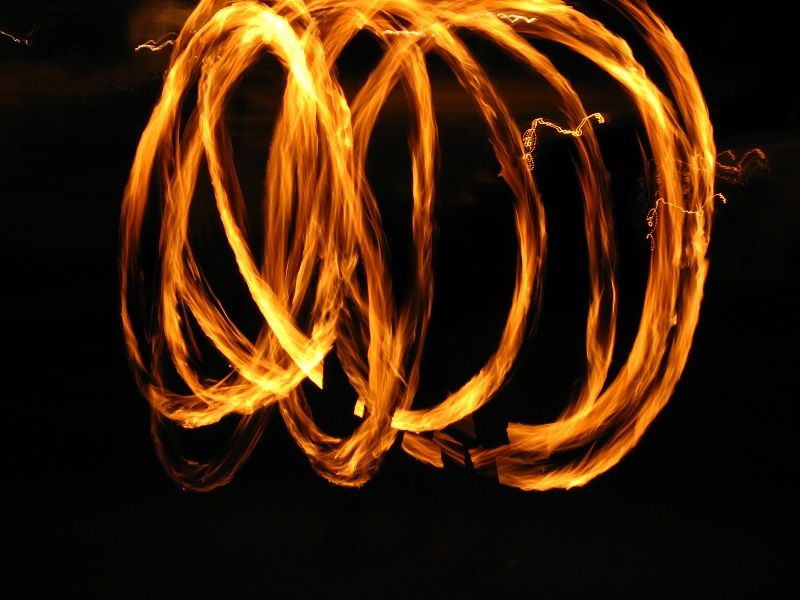
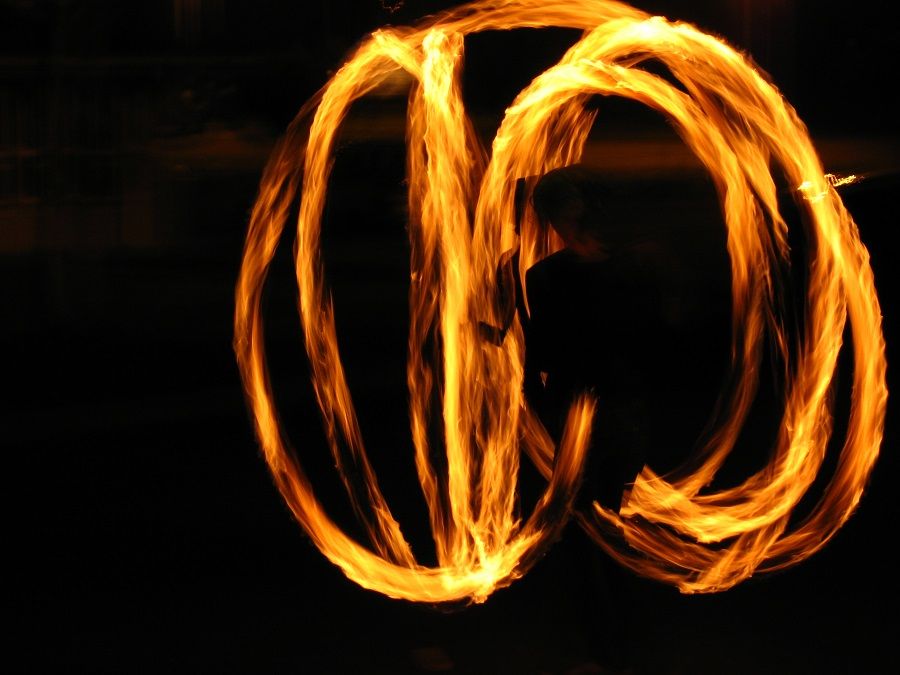
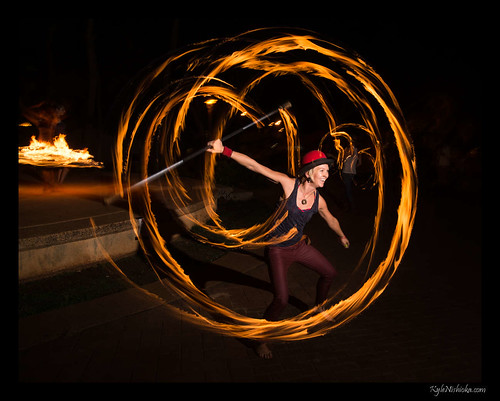
Note: the firework setting on a lot of cameras fails here. With no flash, you get the trail but the subject of the shot will be a blur at best like in the shot here, instead of a solid image like the one that follows


4. Exposure
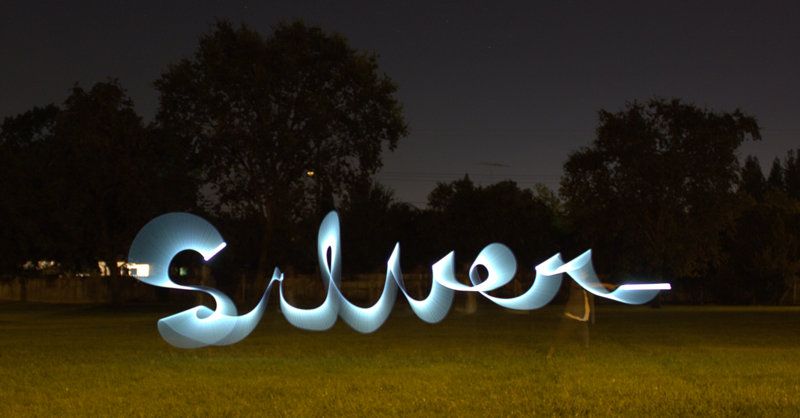
This is an easy one to grasp. How long does the lens stay open? The longer it stays open, the longer the trail. With a long exposure, you can get creative and actually draw. With a mid range, you will capture a spin. With a quick, you will get a slight trail. You will have to play with this setting to suit your needs.


With a knowledge of these features and what they do, you can often save a few to your camera allowing you to get some pretty good shots on the fly. At any rate, it gives you more options than the still pose. Hope this helps. If so, feel free to stickie or move it.
Last Edit: 6 hours 6 minutes ago by Darth Cephalus. Reason: bad link
The administrator has disabled public write access.
The following user(s) said Thank You: Miraluka, JShelar, MystByte

Long exposure shots: A tutorial 1 day 1 hour ago #3800

  • MystByte
  • MystByte's Avatar
  • OFFLINE
  • Platinum Member
  • There is no Dark Side, nor a Light Side, There Is Only The Force
  • Posts: 409
  • Like received: 44
These pics look great! If I can get exposure settings on an iPhone or Moto X, I'll definitely try these out. I have one question however, why don't you appear blurry as well in these photos? The exposure is staying open, and the light bouncing off your body should hit the camera, so why is only the lightsaber blurry and not you?
The administrator has disabled public write access.

Long exposure shots: A tutorial 1 day 1 hour ago #3801

  • Darth Cephalus
  • Darth Cephalus's Avatar
  • OFFLINE
  • Junior Member
  • Many tentacles, the dark side has.
  • Posts: 20
  • Like received: 13
second curtain flash. I am too dark to register through most of the exposure. The only light in the shot comes from either the saber or the flash. Only when the flash hits right before the shutter closes do I get hit with light. Since it only hits for a brief moment, I am crisp instead of blurry.
Last Edit: 1 day 1 hour ago by Darth Cephalus. Reason: clarity
The administrator has disabled public write access.

Long exposure shots: A tutorial 1 day 40 minutes ago #3803

  • Darth Cephalus
  • Darth Cephalus's Avatar
  • OFFLINE
  • Junior Member
  • Many tentacles, the dark side has.
  • Posts: 20
  • Like received: 13
If you want to do it on an iphone, you might try magic shutter
https://itunes.apple.com/app/magic-shutter/id408256708?affId=1860684&mt=8&u1=web
I have never used it but it advertises that curtain flash is part of its functionality.
It is a paid app though, and I don't know how well it can make the other adjustments.
The administrator has disabled public write access.

Long exposure shots: A tutorial 23 hours 27 minutes ago #3810

  • JShelar
  • OFFLINE
  • New Member
  • Posts: 10
  • Like received: 2
Awesome idea. Will have to try this when I get my saber.
The administrator has disabled public write access.

Long exposure shots: A tutorial 8 hours 30 minutes ago #3836

  • Hake Felflame
  • Hake Felflame's Avatar
  • OFFLINE
  • New Member
  • Mad Warlock
  • Posts: 17
  • Like received: 17
I love doing long exposure shots, but the curtain flash is a new concept to me. I'll have to try that out on my own later. Here's an example of what I did with no flash, using a Prizm saber.
Assistant Director - Saber Guild: Golden Gate Temple
Sith Lord of the Golden Gate Knights
The administrator has disabled public write access.

Long exposure shots: A tutorial 8 hours 20 minutes ago #3838

  • MystByte
  • MystByte's Avatar
  • OFFLINE
  • Platinum Member
  • There is no Dark Side, nor a Light Side, There Is Only The Force
  • Posts: 409
  • Like received: 44
That turned out really cool!
The administrator has disabled public write access.

Long exposure shots: A tutorial 8 hours 16 minutes ago #3840

  • Kresnik
  • OFFLINE
  • Junior Member
  • Posts: 31
  • Like received: 3
Great Guide !

The only thing I would add is regarding the second curtain flash-

Just more or less some techy help with nomenclature out there.

You can do a quick online search to find out how to set up your second curtain flash. Some outdated point and shoot digitals actually have the options inside camera to change to Second Curtain or (Last Curtain) flash sync. For example for my camera the Canon 6d

http://www.dummies.com/how-to/content/how-to-use-second-curtain-sync-on-your-canon-eos-6.html

There are several terms for this too and it depends on your camera type but there are several ways you can find it- also, some DSLRs you will have to make the modifications on your actual external flash, others inside camera.

Also, if you do not have a camera that can do a second curtain sync you can use a flash gun, a strobe light (with one quick pulse of light) a super bright high lumens flash light focused on area you want to catch etc and you can use these devices at any time during the long exposure (just not the very beginning). I would not suggest using them with more than one quick pulse of light say from a flash gun, strong flash light strobe light etc.

Just once will capture that light, the stronger the light, the longer the exposure etc the cleaner and crisper the image will look. Too many shots of light and you will get a picture with a lot of flash noise/ fog look to it.

Great guide !
The administrator has disabled public write access.

Long exposure shots: A tutorial 6 hours 7 minutes ago #3869

  • Darth Cephalus
  • Darth Cephalus's Avatar
  • OFFLINE
  • Junior Member
  • Many tentacles, the dark side has.
  • Posts: 20
  • Like received: 13
Good points. My exposures on the outside red/pink shots were 2 seconds. So I was moving pretty fast. The silver one (which is not me) was a much slower shot with a much longer exposure and more ambient light (hence the ghost images). For the red/pinks, I did not have my tripod so I set the camera on a fence post. I was using the display screen, turned so I could see it and a 5 second timer so I could get in front of the camera and set up. Some of the others are better thought out, but the point is you can do it with as much or as little prep as you have. In relation to the flashbulb point, I would also point out that if you get into light painting, you can hold still where you want to be seen and bathe yourself with a flash if your exposure is long enough. Conversely, you could just bathe your head and leave it floating in the image. There is a lot to play with if you have a mind to.
The administrator has disabled public write access.
Threaded Indented

Member Login

Latest Posts

More Topics »

Forum Statistics

  • Total Users: 1007
  • Latest Member: DarthCadence
  • Total Posts: 3728
  • Total Topics: 390
  • Total Sections: 5
  • Total Categories: 19
  • Today Open: 5
  • Yesterday Open: 8
  • Today Answer: 70
  • Yesterday Answer: 86