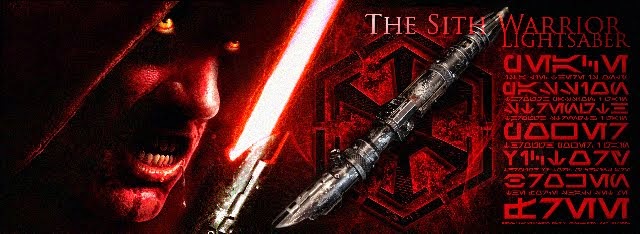
Some Specs and Measurements:
Quad Cree 12watt+ Pink| Sabercore2.0 Crimson Font| Quick Connect LED Module| Brass Accessories (Plug, aluminium knurled kill key*, Covertech)| Bronze Stingray wrap| Grey Weathering
*Yes, SF still has these. They’re randomly included with randomly Ordered Sabers. You can request them without any guarantee of supply. You can’t buy them, even if the Site images still show them as current. So Why?
Hilt Length (Pommel to Emitter): 330mm (12.9921”)
Hilt Length (Pommel to Blade Claw tip): 399mm (15.7087”)
Blade Socket Depth: 48mm (1.8898”)
Emitter Length: 100mm (3.9370”)
Blade Claw Length: 195mm (7.677”)
Emitter Diameter: 35.65mm (1.4035”)
Neck Diameter: 28.65mm (1.1280”)
Body Diameter (w/out switch): 41.18mm (1.6213”)
Body Diameter (inc. switch): 45.99mm (1.8106”)
Wrapped Body Diameter: 37.27mm (1.4673”)
Pommel Diameter: 47.59mm (1.8736)
Weight: 845 grams (29.8065 ounces/1.8629 pounds)
Balance (from Pommel to POI): 198mm (7.7953”)
Balance (from Pommel to POI) 26”: 274mm (10.7874”)
Balance (from Pommel to POI) 32”: 303mm (11.9291”)
Balance (from Pommel to POI) 37”: 334mm (13.1496”)
*
stock setup with both blade-claws attached.
With blade-claws attached, this Hilt tries to be a single hand Saber (with hand placement naturally going for the wrapped body as primary grip) but with the extra weight you either require great strength to wield this mighty hammer or become naturally aided by your second hand (with restrictions). Gripping it like a hammer with primary hand in choke creates a little awkwardness with finding the optimal spot around the switch plate. This has the blades-claws in a forward direction much like a downward swing when wielding a machete or cleaver. When the second hand is introduced, there’s a struggle with the positioning of the Covertech. With such a heavy and lengthy-clawed weapon, a covertech delete, replaced with a mounted D-Ring may free up valuable real estate on a shortened body. The alternative, is for the covertech to be mounted high up on the emitter for reversed belt attachment with blades pointing upwards instead of the traditional downwards.
With blade-claws removed, there is a knock-on effect where grip positions shift-up and with weight dramatically reduced and balance becoming more central, single hand wield with the shorter two blade lengths becomes ideal.
*(
…this is later)I honestly wish this part of my write-ups can be skipped past and not actually exist. But, because it happens a lot and it’s evident to the delivered Hilt I receive and feature, it becomes a necessary inclusion.
As taken from Main Site, it would evidently appear that
high attention to detail isn’t accurately defined or demonstrated here.
C’ Mon Saberforge, I’m getting a lot of dropped balls here with Orders and time’s about due for a regroup to refocus and lift your game. It is likely the reference to
high attention to detail exercised here is the very same
attention to detail as defined by the reference to assembly and precision (or lack thereof). It is due to the
‘preciscion’ &
‘assmebled’ that results with this work of art, falling short.
Raped
Malgus’
Arse!
Likely what the
‘assmebled’ actually refers to. Second chance corrections are becoming a too relied-upon remedy. If the reigns are tighter with Quality Checks before shipping out the product, my deliveries may become more consistently near-perfect much like it has happened once recently with
V1 CR Redeemer. Dafuq!?
The low profile switch plate is a nice touch. Much more ergonomically friendly as compared to a guarded type (i.e.
V1 CR Ares) but this is secured to the foundation of the Switch Part by one buttonhead retention screw and glue is relied upon for the rest.
The glue used experiences significant loss of adhesive strength under
‘normal’ circumstances and as shown here causes the non-screwed side to lift-away, creating a hairline surface break by way of a seam. Could the buttonhead retention screw have been located centred with the two switch holes drilled either side? Likely. But because of the screw position chosen at on side only, well.. balance is compromised with the plates installation.
I had hoped to see the last of this when the very same was experienced with V3 Avenger. Sadly not the case. I’m really left to wonder what adhesive is used other than sugary saliva. Again (outta the box) it looks more like Salacius Crumb has had a go at 3PO’s eye from ROTJ. This is a Fail. To blame it on the glue is also a Fail.
The grey weathering application (specific to this Hilt) is more a painted finish. On the Bladed Claws inside edges, it hasn’t been left to dry or cure sufficiently resulting in stripped sections and surface transfer…
…transfer that creates a stamped splotch no different from an overspray or paint pooling in one spot.
The blade claw retention screws Part I.
If you fail the first time, just give it another shot. It’s just gonna get covered up, no one will notice, right? 
Poor oversight. Poor execution. Poor Supervision.
The blade retention screws Part II. There are two countersunk holes (either side for each blade) that the two hex socket head retention screws (different lengths) feed into for attaching to the Emitter. Got it right with the longer two, notso much with the bottom two where not only do they stick out from the recessed hole, they do so unevenly. *sigh* Moving on..