Welcome, Guest
Username: Password: Remember me
Threaded Indented

TOPIC: SF Bastion NBv3 Finished

SF Bastion NBv3 Finished 11 months 2 weeks ago #71120

  • brandonr117
  • brandonr117's Avatar
  • Offline
  • Junior Member
  • Posts: 23
  • Thank you received: 3
Hey all, since my conversion didn't really pan out to well, I thought about fully converting it, but then I saw the Bastion and couldn't say no.
Now I'm here.
Here's my parts list
SF Bastion
Nano Biscotte V3
B/B/W Tri-Cree LED
1ohm 2 watt resistors (for each LED, including white)
Ryo's Shapeways All-In-One NBv3 1.10" Chassis
SF Recharge Port and Switch
TCSS Panasonic Li-On 18650 3.7V 3400mAh batter
28mm 2w Bass Speaker
TCSS 1" Heatsink Module
(I think that's all).

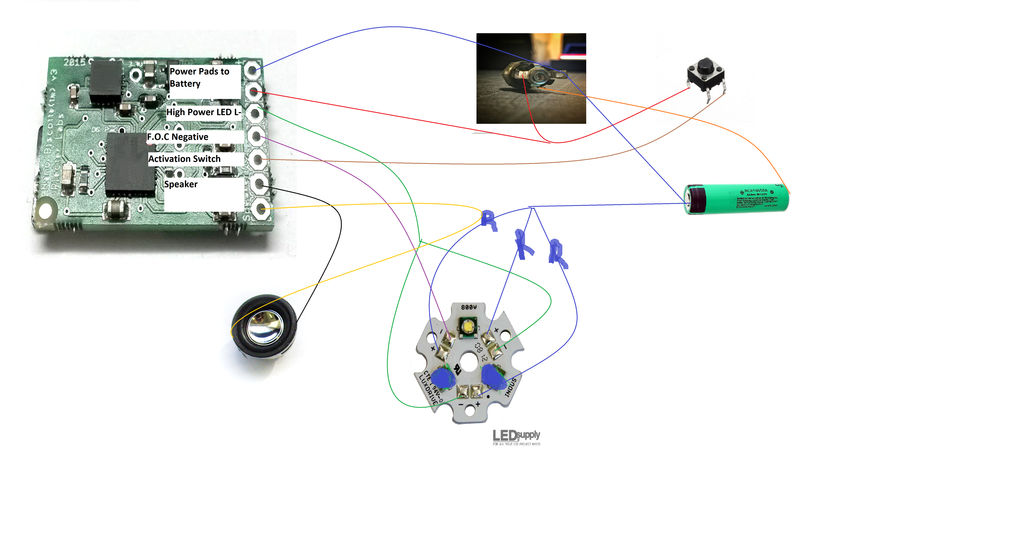
Now here is the wiring diagram I mocked up using Paint
Anyone can confirm this to be correct? (I'd be uber happy if it is lol)
Also another question, would the resistor choice dim my LEDs at all?


If it is correct, feel free to use it.
Last Edit: 11 months 1 week ago by brandonr117.
The administrator has disabled public write access.

SF Bastion NBv3 Wiring Diagram 11 months 2 weeks ago #71128

  • Kouri
  • Kouri's Avatar
  • Online
  • Platinum Member
  • That guy.
  • Posts: 1056
  • Thank you received: 755
Those resistors will indeed dim the setup. I'd recommend knocking them all down to 0.5ohm each.
The administrator has disabled public write access.
The following user(s) said Thank You: brandonr117

SF Bastion NBv3 Wiring Diagram 11 months 2 weeks ago #71129

  • brandonr117
  • brandonr117's Avatar
  • Offline
  • Junior Member
  • Posts: 23
  • Thank you received: 3
Hmmm, was worried about that. Thank you Kouri again for coming in with a save! :)
TCSS has 3w .5 ohm. Those should be good enough?

Also, is the diagram correct?


Thanks
Last Edit: 11 months 2 weeks ago by brandonr117.
The administrator has disabled public write access.

SF Bastion NBv3 Wiring Diagram 11 months 2 weeks ago #71130

  • Vechaljian
  • Vechaljian's Avatar
  • Online
  • Platinum Member
  • Posts: 348
  • Thank you received: 199
Schematic looks good, I'd drop a resistor on the white if your using it for flash on clash it won't hurt to be with out one since it's not on all the time....the .5 ohm resistors tcss uses are quite large, not a big deal if space is good but I've just been adjusted drive settings on my nb3's for blue/greens as some of my asp builds have been very short.. cram-fu if you will:) at any rate your on the right path so have fun...it's very addictive once you build
One
The administrator has disabled public write access.

SF Bastion NBv3 Wiring Diagram 11 months 2 weeks ago #71131

  • brandonr117
  • brandonr117's Avatar
  • Offline
  • Junior Member
  • Posts: 23
  • Thank you received: 3
Vechaljian wrote:
Schematic looks good, I'd drop a resistor on the white if your using it for flash on clash it won't hurt to be with out one since it's not on all the time....the .5 ohm resistors tcss uses are quite large, not a big deal if space is good but I've just been adjusted drive settings on my nb3's for blue/greens as some of my asp builds have been very short.. cram-fu if you will:) at any rate your on the right path so have fun...it's very addictive once you build
One

Let's hope I have enough space in the Bastion to hold them in. I'll be using one on each die.

Thank you!
The spending part (worst part) is over
Now to wait for the fun parts to arrive :D
The administrator has disabled public write access.

SF Bastion NBv3 Wiring Diagram 11 months 2 weeks ago #71135

  • Jas-Ot
  • Jas-Ot's Avatar
  • Offline
  • Platinum Member
  • Posts: 1046
  • Thank you received: 322
The apprentice hilts are a little low on extra space, you may need to get creative with the install. You may not have room for the bass speaker in the bastion. I'd recommend the normal "premium" speaker.

The .5 ohm resistors are almost twice the size of the 1 ohm. What you can do is use a piece of blade stock that will go in the "switch section" area. Cut a slot in it so there is clearance for the switch and RP. Mount it right behind the heatsink and you can hot glue the resistors to the side of it. You should have just enough clearance for the RP and switch.
The administrator has disabled public write access.
The following user(s) said Thank You: brandonr117

SF Bastion NBv3 Wiring Diagram 11 months 2 weeks ago #71144

  • brandonr117
  • brandonr117's Avatar
  • Offline
  • Junior Member
  • Posts: 23
  • Thank you received: 3
Thank you for the advice.
I was a bit nervous on the lack of room.
I bought a Ryo All-In-On Chassis.

I found an image of .5 ohm 3 watt resistor, and damn they are beefy, but I think I can make it work if I make my led wires pretty short and keep them up by the heatsink.

I like that idea with the blade stock, luckily I have some on-hand.

I'll try first with the bass speaker and see how I can make it work.

I love me a good challenge.

Does the Bastion unscrew from the heatsink area?
The administrator has disabled public write access.

SF Bastion NBv3 Wiring Diagram 11 months 2 weeks ago #71150

  • Jas-Ot
  • Jas-Ot's Avatar
  • Offline
  • Platinum Member
  • Posts: 1046
  • Thank you received: 322
No, it's a solid piece. Another cram-fu technique is to use the blade stock like i mentioned and build everything except for the the RP and switch as if the heatsink, blade stock and chassis were a single piece that was exactly the length of the inside of the hilt. You would solder long leads for the switch and RP to the by feeding them through the holes. Then insert the whole thing in. Pull the leads for the switch and RP out as far as they will go. Then solder then switch and RP just barely outside the hilt. You should have just enough wiggle room to set them in the holes.

Downside to this method is you can't pull the chassis out the bottom of the pommel.
The administrator has disabled public write access.
The following user(s) said Thank You: brandonr117

SF Bastion NBv3 Wiring Diagram 11 months 2 weeks ago #71177

  • Kouri
  • Kouri's Avatar
  • Online
  • Platinum Member
  • That guy.
  • Posts: 1056
  • Thank you received: 755
I just grab my resistors in bulk from Mouser. Here're some 0.51ohm 2W that should be easier to fit.

http://www.mouser.com/Search/ProductDetail.aspx?R=MOX2CR51J

Alternatively, an SR540 rectifier diode can be installed on the common LED+ line to prevent the voltage ripple that causes phantom swings on NB, at the expense of a 0.3v drop. On a BBW star, the single diode and some drive/fdrive adjustment should be enough to keep things stable without any extra resistors. This does, however, have the side effect of shutting off the LED a few minutes sooner than a resistor setup would.
The administrator has disabled public write access.
The following user(s) said Thank You: brandonr117

SF Bastion NBv3 Wiring Diagram 11 months 2 weeks ago #71201

  • brandonr117
  • brandonr117's Avatar
  • Offline
  • Junior Member
  • Posts: 23
  • Thank you received: 3
Thank you guys for all your help!

I would be completely lost and probably very scared of wiring my saber, but honestly thank you :D

I ordered a few of those resistors. Gonna have a collection now lol


Again thank you so much!!! Hopefully my hilt arrives later this week and I can begin :)
The administrator has disabled public write access.

SF Bastion NBv3 Finished 11 months 1 week ago #71509

  • brandonr117
  • brandonr117's Avatar
  • Offline
  • Junior Member
  • Posts: 23
  • Thank you received: 3
Just wanted to give an update.
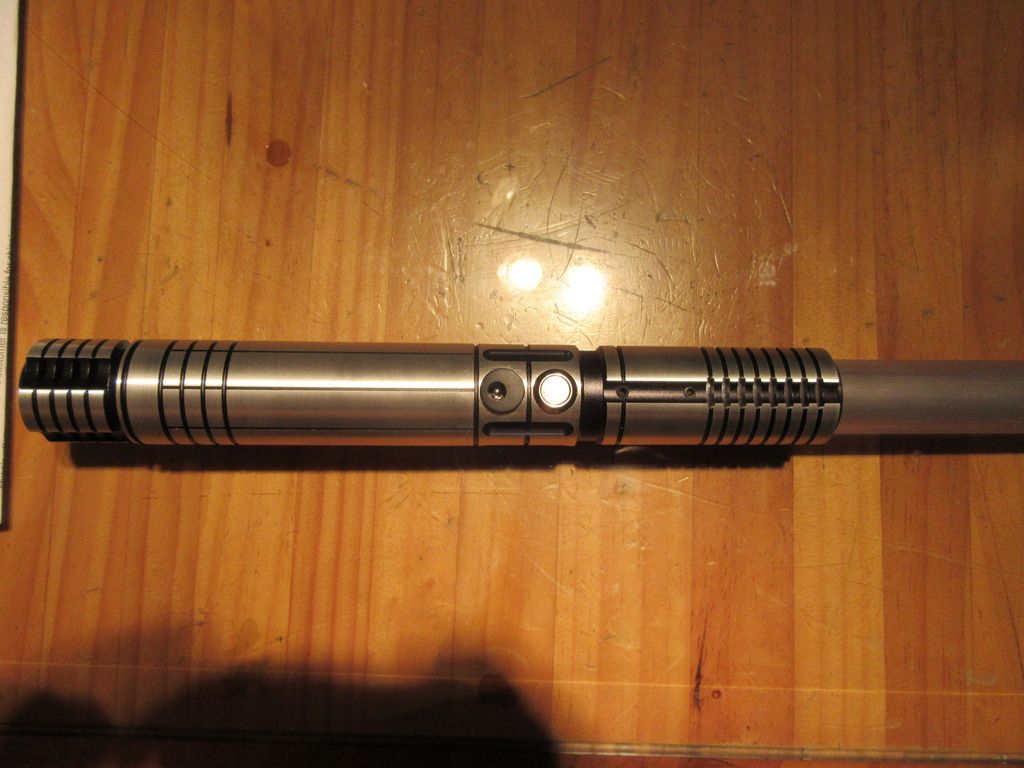
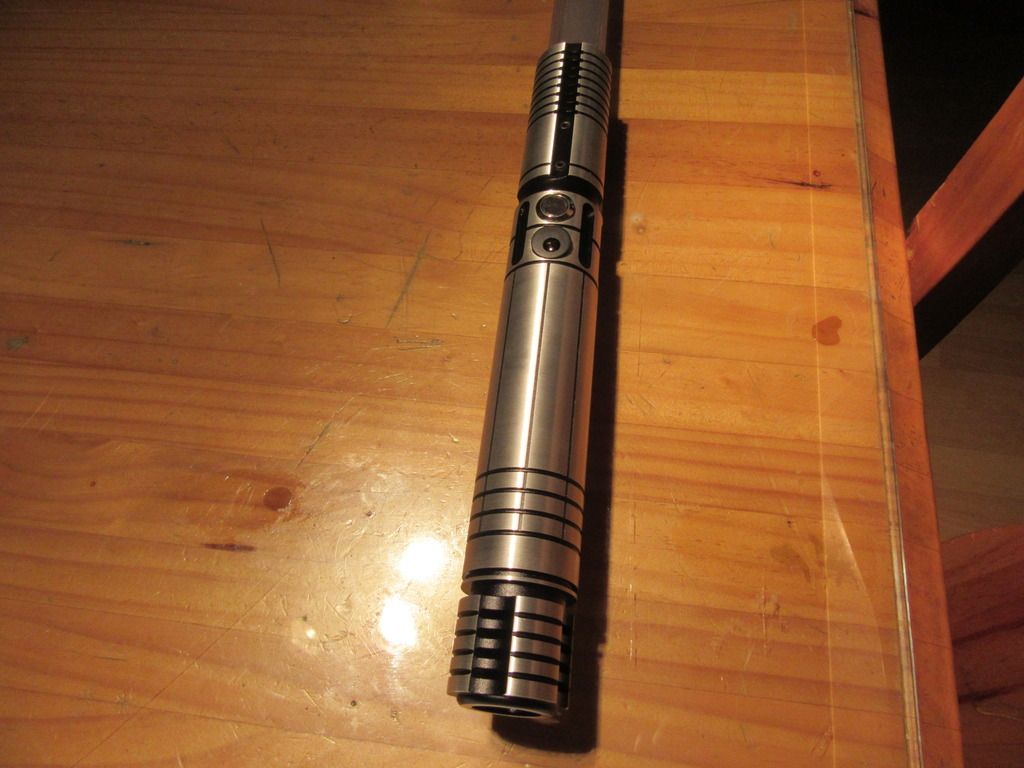
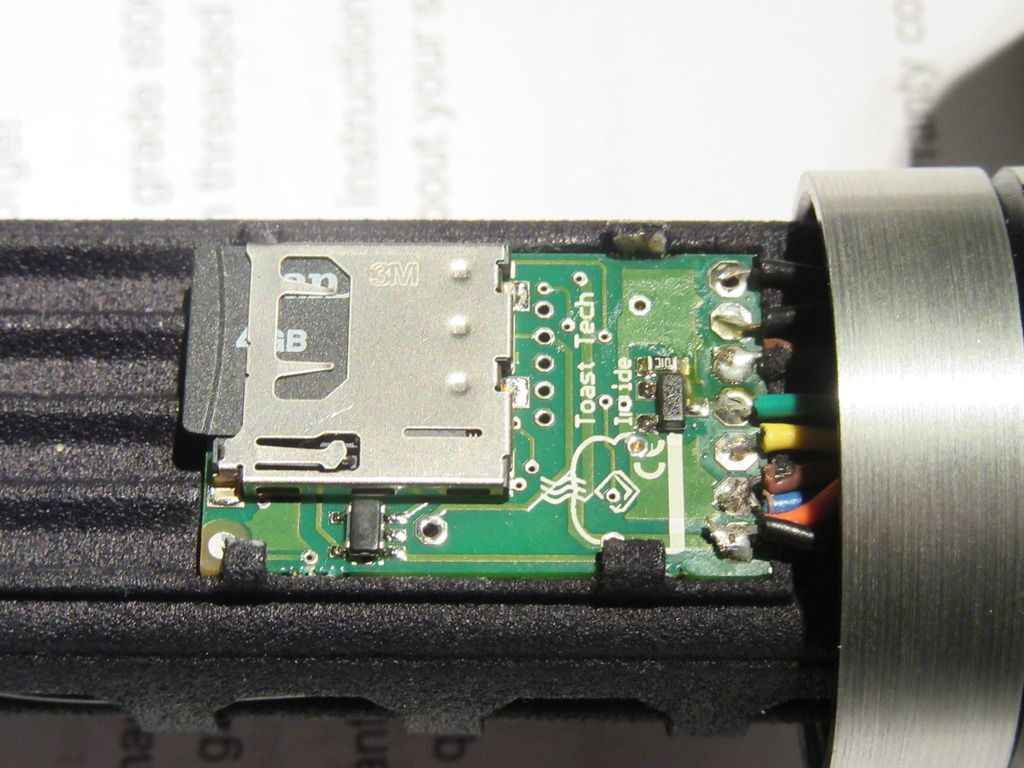
Got my Bastion yesterday and completed the install.
It was a tough experience, but glad I did it.
My soldering tip was giving me trouble throughout the whole install, so I may resolder it a bit cleaner later, but for now it works perfectly, so I won't touch it
I'm so happy with the results
The Bastion is a beautiful hilt!


Now a video. Using Blako's Pitch Black and Blako's Graflex TFA Font. My fave fonts!
Last Edit: 11 months 1 week ago by brandonr117.
The administrator has disabled public write access.
Threaded Indented

Member Login

Latest Posts

    • Blade Length (2 Posts)
    • You can get the blade tube @ 40 inches uncut if your willing to make them yourself, need to also get...
    • Blade Length (2 Posts)
    • Is there any way to get a larger blade? 36"/37" seems to be the ideal length, however with the way...
    • Timing shims (3 Posts)
    • I'm building it myself. Thank you for the info man.
    • Saberforge Customs Price ... (16 Posts)
    • Quote: Quote: How long does it normally take them to reply to enquires? I sent them an email on the 20th Dec about...
    • Continuous Upgrade expens... (19 Posts)
    • If you go for an empty Elite hilt $150 plus ASP PNP Veteran $150 plus LED $40 plus AV switch $10...

More Topics »

Forum Statistics

  • Total Users: 6343
  • Latest Member: hfbncGap
  • Total Posts: 63.2k
  • Total Topics: 5331
  • Total Sections: 24
  • Total Categories: 136
  • Today Open: 3
  • Yesterday Open: 5
  • Today Answer: 17
  • Yesterday Answer: 29