3D Printed Lightsaber Hilt: Materials, Fit, Files and Licences
To make a 3D printed lightsaber hilt, print it on an FDM printer in PLA or PETG, design for a chassis and a tight fit, then sand and paint. Heat and layer strength are the weak points. Check each file's licence, and do not sell Star Wars designs.
Short answer
To make a 3D printed lightsaber hilt, print it on an FDM printer in PLA or PETG, design for a chassis and a tight fit, then sand and paint. Heat and layer strength are the weak points. Check each file's licence, and do not sell Star Wars designs.
On this page11 sections
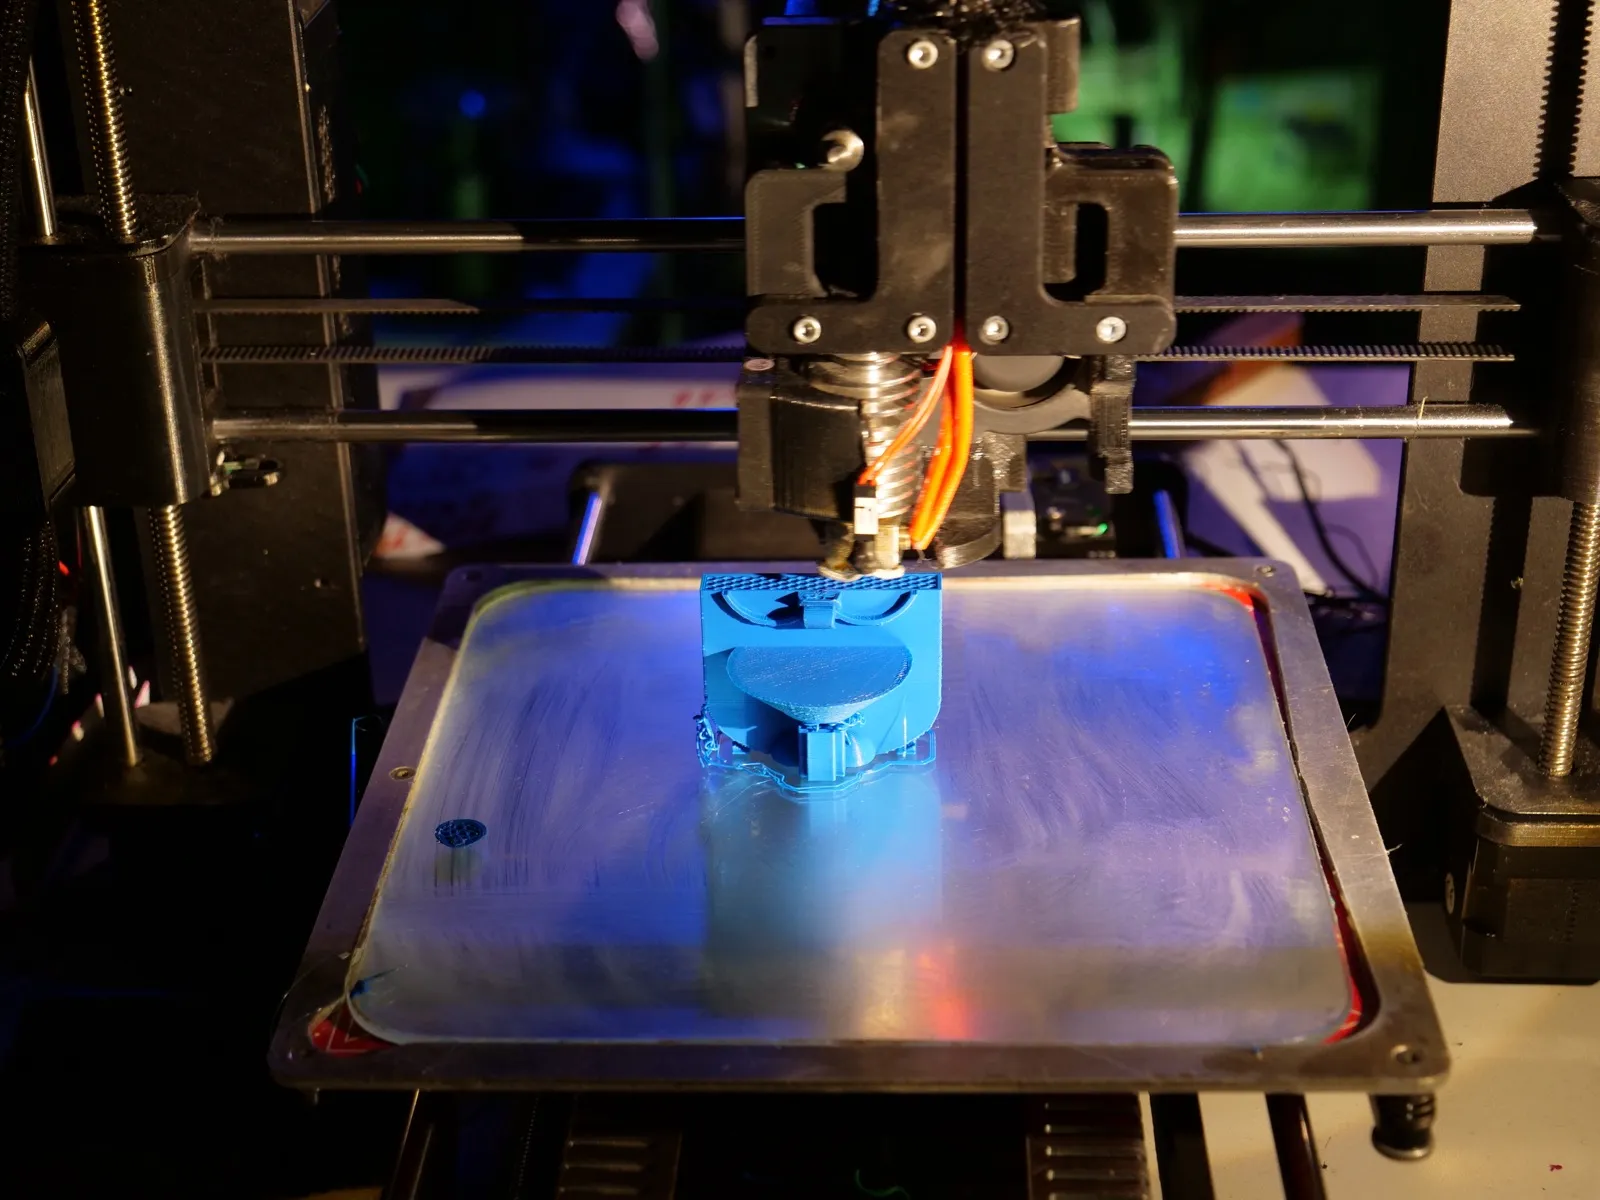
A 3D printed lightsaber hilt is usually printed on an FDM printer in PLA or PETG, then sanded, primed and painted [1][7][8]. What decides whether it works is the wall thickness, the clearance on threaded joints, and what sits inside: a chassis, a board and a lithium-ion cell [1][6][18]. Plastic also softens at far lower temperatures than aluminium, which matters once an LED is running [2][5][19].
This page covers printing the body. For taking a hilt apart or finishing a bought one, see customize a lightsaber hilt. For the board, speaker and cell, see install electronics in a lightsaber hilt. For hilt parts and names, see lightsaber hilts.
FDM or resin
FDM printers melt filament and lay it down in layers. Resin printers cure liquid photopolymer. Both can make a hilt, but the sources I opened document different things about each.
For FDM, Adafruit’s printable saber hilt is designed for FDM machines and lists 0.2 mm layers, a 0.4 mm nozzle, 20 percent infill and PLA filament [1]. It says the parts need tight tolerances and the pommel and emitter threads may need several dry fits [1].
For resin, the documented part is the handling. Formlabs warns that resin may cause skin irritation or an allergic skin reaction, never to ingest it, and that isopropyl alcohol is flammable [9]. Used resin and washing solution must not go down a drain or into household waste [10].
I found no source with a head to head strength comparison of resin and FDM hilts, so this page does not claim one. If you print in resin, the safety steps are the main extra work. If you print in FDM, tolerance and heat are.
Which material
PLA is the most widely used FDM filament, with good printability and strength, but its glass transition is only about 60 to 65 °C [2]. ABS has a glass transition of about 105 °C, can be sanded and painted, and tends to warp, so it wants an enclosure and a heated bed [3]. PETG replaces some ethylene glycol with a bulkier unit, which makes it a clear amorphous plastic that is popular for printing [4].
One lab-style comparison of three Prusament filaments gives numbers, though they apply to that brand only [5].
| Material | Softened under load at | Toughness (notched Izod) | Layer adhesion vs sideways strength | Notes |
|---|---|---|---|---|
| PLA | about 60 °C [5] | 5 kJ/m² [5] | 55 percent [5] | Easy to print, stiffest of the three [5] |
| PETG | about 80 °C [5] | 8.6 kJ/m² [5] | 46 percent [5] | Stretches before it breaks [5] |
| ASA (like ABS) | 110 °C [5] | 18 kJ/m² [5] | 29 percent [5] | Best heat resistance, weakest between layers [5] |
| ABS | glass transition 105 °C [3] | not in the source | not in the source | Warps, needs an enclosure, can be smoothed with acetone vapour [3][7] |
A vendor blog recommends PLA for early attempts, ABS for drop resistance and PETG for sliding parts because PLA sticks, but that seller also sells filament, so treat it as one opinion [7].
In short: PLA for a display hilt that will not get warm, PETG where some stretch helps, and ASA or ABS if the LED or the environment runs hot [2][3][5].
Wall thickness and tolerances
A service bureau’s FDM guideline gives a floor for wall thickness that rises with part size: 1.6 mm for a 50 by 50 mm section, 2.0 mm at 100 by 100 mm, and 2.5 mm at 200 by 200 mm [6]. Walls for snaps, fasteners and positioning features should be above 1.5 mm [6]. Treat these as minimums for printing, not as a strength target for a tube that will be dropped.
The same guideline lists plus or minus 0.3 mm within 100 mm, plus or minus 0.4 mm for holes, and at least 0.5 mm clearance between mating parts [6]. Holes tend to print smaller than designed, and for tight threads you should leave extra room and tap or ream them yourself [6]. Adafruit’s own hilt says the pommel and emitter threads may need dry fitting several times [1]. Your printer may do better than a bureau, so print a test ring first.
Print orientation affects surface and strength. A vendor guide says to print hilts vertically to avoid support marks on the main body [7]. In the comparison above, layers hold less load than a part pulled along its layer lines [5]. That is my reading, not a source claim, but it suggests a hilt hit sideways is loaded across its layers.
Chassis and electronics fit
A printed hilt is a shell. Inside it you need a frame that holds the board, speaker and cell, called the chassis [19]. Design the bore to the chassis you will use, with room for the cell and wiring, and leave access to the charging port and button.
Heat decides the layout. A project handbook states that plastic holds heat worse than metal, so powerful LEDs in a printed body need an aluminium tube inside [19]. An old forum thread summarised in the same handbook describes printing the outer body over an aluminium tube for this reason [19]. With PLA softening around 60 to 65 °C, a body that touches a hot LED holder is a risk [2][5].
For the cell, Battery University says heat is always an enemy of lithium-ion, and that a cell in thermal runaway can quickly reach 500 °C [18]. Keep cells away from the LED path and read lightsaber batteries before you design the bay. The wiring, boards and sound side are in install electronics in a lightsaber hilt and the parts list.
Sanding and painting
A typical finishing path comes from vendor guides. Remove supports with flush cutters, sand support marks with 220 grit, then 220 or 320 followed by 400 or 600, wipe with a tack cloth, and spray thin coats of primer from 6 to 8 inches away [8]. Another guide gives 120 to 220 for layer lines, 400 to 600 for scratches and 1000 to 3000 for a polish before paint, and says not to skip grits [11]. Wet sanding makes less dust [11].
White filament is the easiest base for paint, and metallic filaments rarely look right, so a vendor suggests metallic paint over grey or black filament [7]. Primer fills very small cracks, and larger flaws need modelling putty [8].
Spray with a NIOSH-approved respirator, ventilation and nitrile gloves [8]. For dust from sanding, a dust mask is the minimum the source names [11].
Strength and heat
A printed hilt is not a replacement for a duelling saber. If you want contact sparring, a sport saber is the right tool, as best lightsaber for dueling explains, and the real lightsaber page covers what the product category is. Use a printed hilt for display, cosplay and light handling.
A printed hilt has three weak points:
- Heat. PLA softens at roughly 60 to 65 °C [2][5]. PETG gave way near 80 °C in the Prusament test [5]. Keep a hot LED off the plastic.
- Layers. Parts are weaker across layers than along them, so print walls well above the minimums [5][6].
- Threads. Printed threads wear. Hilts that unscrew often are better with metal inserts or a metal ring at the joint (editor suggestion, no source).
Where to find files and licences
Printables lets each uploader choose a licence, including Creative Commons variants, GNU, Apache, CERN Open Hardware and a Commercial Use licence, and its terms say people using a file must follow that licence [12]. Prusa says it grants users no licence of its own [12]. The terms also say uploaders must have authorisation to publish and must not infringe third-party rights, including intellectual property [12].
Thingiverse also lets contributors choose a licence for each design, with GNU and Creative Commons options [14]. Its current terms page blocked my fetch, so read it yourself before you rely on it.
A non-commercial Creative Commons licence defines commercial use as use primarily intended for commercial advantage or monetary compensation [13]. You must credit the creator, link the licence, and say if you changed the file [13].
Star Wars is different. A file’s licence covers the uploader’s model. It does not settle Lucasfilm’s rights in the design (editor reading, not legal advice). I found no published Lucasfilm policy on 3D printed props. What is sourced is about fan films, which Lucasfilm has allowed but not endorsed, so long as no work tries to make a profit [15]. A vendor blog says selling Star Wars items is illegal without Disney licensing, but it cites no source [7]. The safe habit is to print for yourself, give credit, and not sell copies of recognisable designs.
Darth Revan hilt
Revan first appeared in the 2003 game Knights of the Old Republic, which BioWare developed [16][17]. Revan is a Legends character, though the name also appears in current canon, where a Sith Eternal legion is named after Darth Revan in a visual dictionary [16].
There is no single “Revan hilt” to copy. In the game, the player character is customisable, and the masked Darth Revan look was designed separately [16]. The game itself offers lightsaber customisation, including crystal colours and blade styles [17]. The project handbook notes that the colour depends on the player [19]. I found no official dimensioned drawing in the sources I opened.
So a file titled “Revan hilt” or “Darth Revan lightsaber” is a fan interpretation. Check the uploader’s licence, whether it assumes a particular chassis, and how it splits into parts. Then apply the aluminium inner tube advice above, because the forum build the handbook describes did the same [19].
Decision path
- Display or cosplay only? PLA is enough. Skip the aluminium tube if there is no LED [2][19].
- Lights and sound inside? Plan a chassis and a metal tube behind the LED [19]. Choose PETG or ASA over PLA if the body gets warm [5].
- Want to handle it hard or duel? Buy a sport saber or a machined hilt instead [7][19].
- Want a movie look? Use grey or black filament and metallic paint, or use ABS and smooth it [3][7].
- Want to share or sell prints? Do not sell Star Wars designs. Follow each file’s licence [12][13][15].
Sources
- Adafruit, Saber Hilt Parts (3D printing), https://learn.adafruit.com/lightsaber-featherwing/3d-printing (accessed 2026-11-07)
- Wikipedia, Polylactic acid, https://en.wikipedia.org/wiki/Polylactic_acid (accessed 2026-11-07)
- Wikipedia, Acrylonitrile butadiene styrene, https://en.wikipedia.org/wiki/Acrylonitrile_butadiene_styrene (accessed 2026-11-07)
- Wikipedia, Polyethylene terephthalate (PETG section), https://en.wikipedia.org/wiki/Polyethylene_terephthalate (accessed 2026-11-07)
- CNC Kitchen, Comparing PLA, PETG and ASA (Prusament), https://cnckitchen.com/blog/comparing-pla-petg-amp-asa-feat-prusament (accessed 2026-11-07)
- JLC3DP, 3D Printing Design Guideline, https://jlc3dp.com/help/article/3d-printing-design-guideline (accessed 2026-11-07)
- Siraya Tech, Star Wars 3D print (vendor blog), https://siraya.tech/blogs/news/star-wars-3d-print (accessed 2026-11-07)
- Formlabs, Guide to Painting 3D Printed Parts: Priming, https://formlabs.com/eu/blog/priming-3d-printed-parts/ (accessed 2026-11-07)
- Formlabs, Safety with Form Wash, https://formlabs.com/support/Safety-with-Form-Wash/ (accessed 2026-11-07)
- Formlabs, Resin Washing Solution, https://formlabs.com/support/Formlabs-Resin-Washing-Solution/ (accessed 2026-11-07)
- Unionfab, How to Sand 3D Prints, https://www.unionfab.com/blog/2024/10/how-to-sand-3d-prints (accessed 2026-11-07)
- Prusa Research, Printables.com Terms of Service, https://www.prusa3d.com/page/printables-com-terms-of-service_231249/ (accessed 2026-11-07)
- Creative Commons, Attribution-NonCommercial 4.0 deed, https://creativecommons.org/licenses/by-nc/4.0/ (accessed 2026-11-07)
- Wikipedia, Thingiverse, https://en.wikipedia.org/wiki/Thingiverse (accessed 2026-11-07)
- Wikipedia, Star Wars fandom, https://en.wikipedia.org/wiki/Star_Wars_fandom (accessed 2026-11-07)
- Wikipedia, Revan, https://en.wikipedia.org/wiki/Revan (accessed 2026-11-07)
- Wikipedia, Star Wars: Knights of the Old Republic, https://en.wikipedia.org/wiki/Star_Wars:_Knights_of_the_Old_Republic (accessed 2026-11-07)
- Battery University, BU-304a Safety Concerns with Li-ion, https://batteryuniversity.com/article/bu-304a-safety-concerns-with-li-ion (accessed 2026-11-07)
- Handbook, DIY route 5 and Revan card, handbook/sabers/diy.md and handbook/sabers/revan-variable.md (resting on 2016 forum threads; Revan facts checked against sources 16 and 17)
FAQ
Can you 3D print a lightsaber hilt?
Yes, on an FDM printer. Adafruit publishes a hilt designed for FDM machines [1].
What material is best for a 3D printed lightsaber hilt?
PLA is easiest, PETG handles more heat and bending, and ASA or ABS handle the most heat [2][3][5]. Brand differences apply.
Is a 3D printed hilt strong enough to duel with?
Treat it as a display or cosplay piece. Layer strength is lower than sideways strength, and no source I opened rates printed hilts for contact [5].
Can I sell a printed lightsaber hilt?
Not a Star Wars design. A non-commercial licence bars commercial use [13], and Lucasfilm tolerance of fan work is tied to not making a profit [15]. This is not legal advice.
Can I use a Printables or Thingiverse file for free?
Only on the terms of the licence the uploader picked [12][14]. Read the licence on the model page.
Where do the electronics go?
On a chassis inside the bore, with an aluminium tube behind a powerful LED [19]. See install electronics in a lightsaber hilt.
Is there an official Darth Revan lightsaber hilt?
I found no official hilt drawing. Revan is a Legends character and the game let players choose colours [16][17][19].
Last checked: 2026-11-07. If you would rather start from a bought hilt, see build your own lightsaber.
Editorial team
Writes for Saber Forge Forum. Every guide is checked against the maker's specs and dated, so you know how fresh it is.
Read next
Customize a Lightsaber Hilt: Take It Apart, Finish and Modify
To customize a lightsaber hilt, first take it apart: empty it, then free glued threads with heat or acetone, or a vice with soft jaws. Then choose a finish (weathering, etching, powder coat, wrap) and mods like kill keys, windows and accent LEDs. Check wall thickness before you drill.
Install Electronics in a Lightsaber Hilt: Boards, LEDs, Switches
To install electronics in a lightsaber hilt, fit a chassis that matches the bore, bench-test the board, then wire the battery, speaker, switch, LED or blade connector and charge port. Follow your board's own wiring diagram, remove the SD card before soldering, and read the lithium-ion safety note first.
Lightsaber Hilts: Types, Materials and Empty Hilts Explained
A lightsaber hilt is the handle and body of a saber, everything except the blade. Empty hilts come without electronics, a chassis holds the board and battery inside, and most real hilts are machined aluminium or printed plastic. Empty hilts start around $51 as of November 2026.
Build Your Own Lightsaber: A Step-by-Step DIY Guide
To build your own lightsaber, pick a route (assembled kit, plug-in modules, or a soldered Proffieboard build), buy a matching hilt and parts, bench-test the wiring, then install the software and close the hilt. A first soldered build is a weekend or two. Read the battery and soldering safety rules first.